Hey there flower friend!
This past weekend we threw my sister a little sprinkle for her second kiddo. I am so excited to become an anty again!
Of course I had to shower my sister with our gorgeous winter tulips which we grow in our basement (yes, basement!) in the wintertime. My sis is due in the spring and I know SO MANY women have babies in the spring, so late winter is prime baby shower season!
Here are a few tips and tricks to arranging a beautiful tablescape with locally grown tulips and give your sister or bestie the baby shower of her dreams!

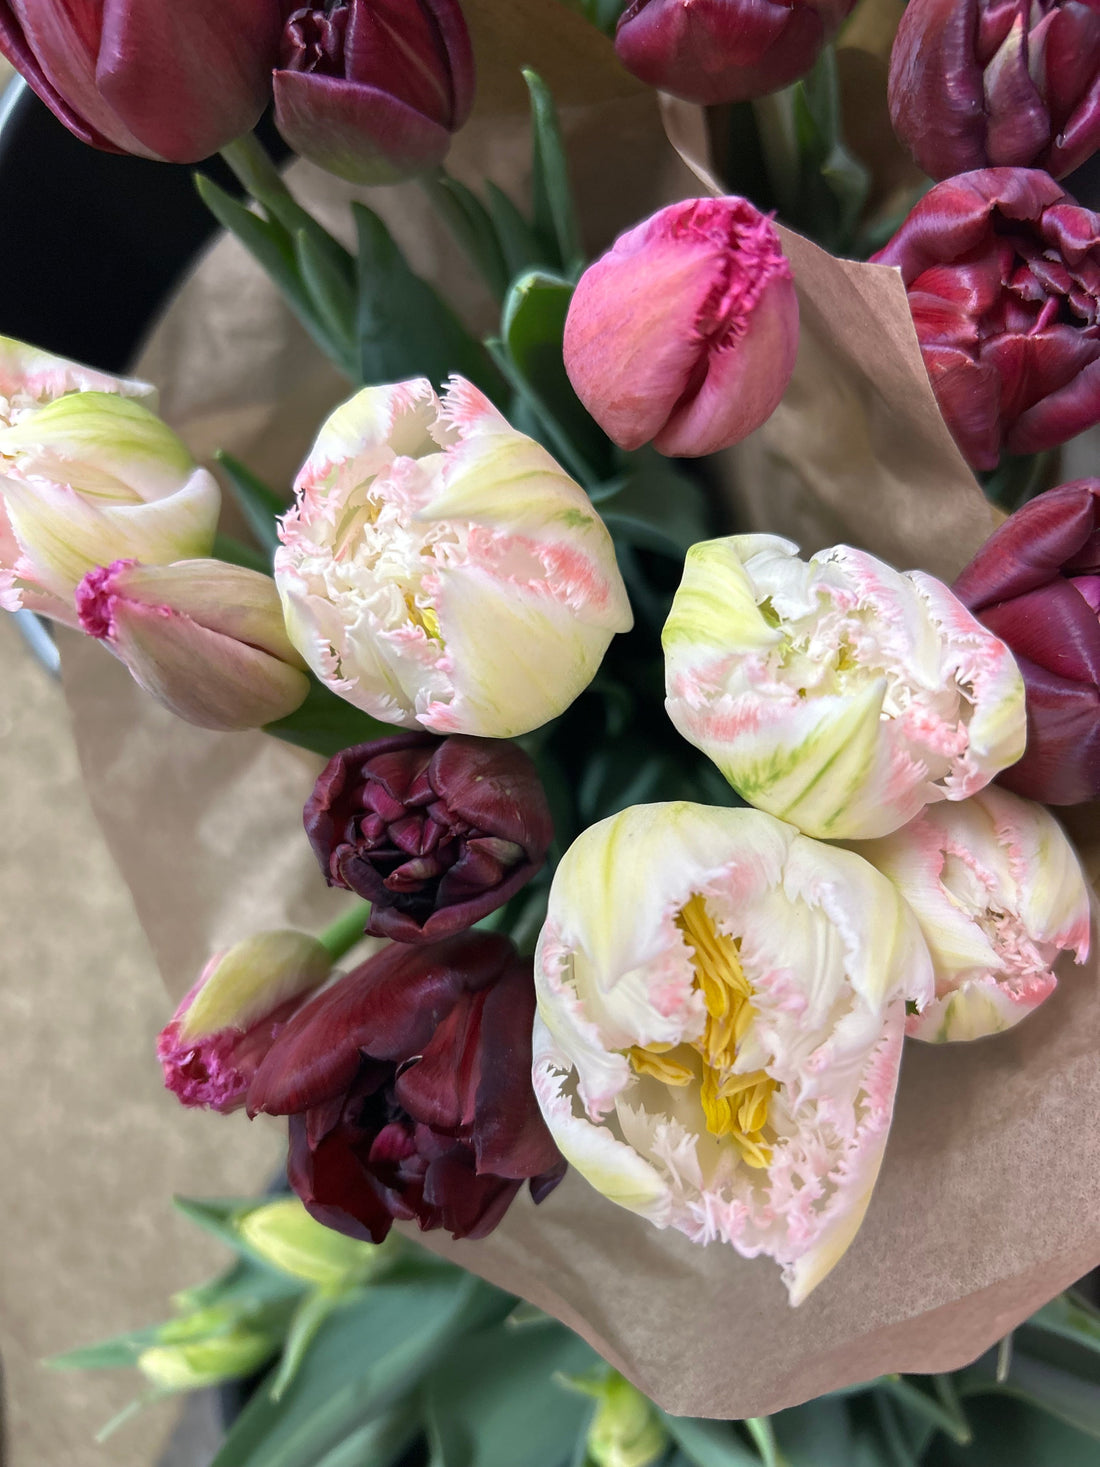
- Combine different varieties: Winter tulips often come bunched in single varieties, at least that's how we sell most of ours, and I LOVE seeing the color combinations my customers put together for themselves! For my sister's shower, I selected a palette of dark burgundy double tulips along with ethereal white and pink double fringe tulips and a fuschia single tulip to give a nice berry-colored color palette.
- Tulip Prep (Time to Wake these Babies Up!): A few days before the shower, make sure to purchase your tulips and hold them in water in a warm room so that they open. Most tulips are sold when closed to give the longest vase-life, but you want your tulips to be open for the event for all to enjoy! So go ahead and let them open fully. The warmer the room you put them in, the faster they will open. When in doubt, on your way to the shower in the car, blast the heat!
- Vases: Sisters, not Twins: Depending on the "vibe" you are going for, select your plates, glasses and then vases. The best part is? - they don't have to match! I love using glass vases because you can mix and match different sizes and shapes easily. This way, the attention is on the flowers, not the vessels. In our case, we used two large glass vases that my mom already had, and purchased a handful of smaller bud vases that we put 3 flowers each in.
- Arranging the Tulips: Give all of your tulips a clean cut on the bottom of the stem before adding to an arrangement. Add a couple inches of cool, clean water in the bottom. And pro tip - remove any leaves that are below the water-line since they can encourage rot. Make sure to combine colors somewhat evenly across the whole arrangement. For the smaller bud vases, we added three flowers, making sure to have one of each color, and put them at slightly different heights to give movement to the arrangements. The number doesn't matter, whatever fills your vessel, but in general, keep the number odd: for example, 1, 3, 5. This design rule never fails!
- Create impact by reflexing some petals!: Reflexing tulips opens them up wide and creates a huge impact in your arrangement. Simply make sure that the flowers have fully colored up and opened, and then one by one, invert the curve of the petal so that they splay out instead of cup inward. I find the hugest difference is with single tulips (with only one ring of petals). Here, I reflexed the fuchsia single fringe tulip to add drama and add more of a focal point to the arrangement. I added 3-5 reflexed tulips to the large arrangements, and one to each of the bud vases. This will definitely give you that "wow"-factor!
With a little bit of prep and creativity, you can create a beautiful shower from locally grown winter tulips too!
And if you are unsure about where to find locally grown winter tulips in your area, please reach out to me at miranda@newpetalflowerfarm.com. I'd be happy to help!
Cheers!
Miranda